How to create an Out of Hours Alert
“Out of Hours Alert” enables the sending of an E-mail Alert Notification upon the first ‘Out Of Hours' infringement committed within the Profile period, e.g. A single E-mail will be sent regardless of the number of infringements committed by a single Vehicle within the Out Of Hours Profile period for the day. Where multiple Vehicles within the same ‘Out Of Hours’ Profile commit an infringement, an E-mail shall be sent for each.
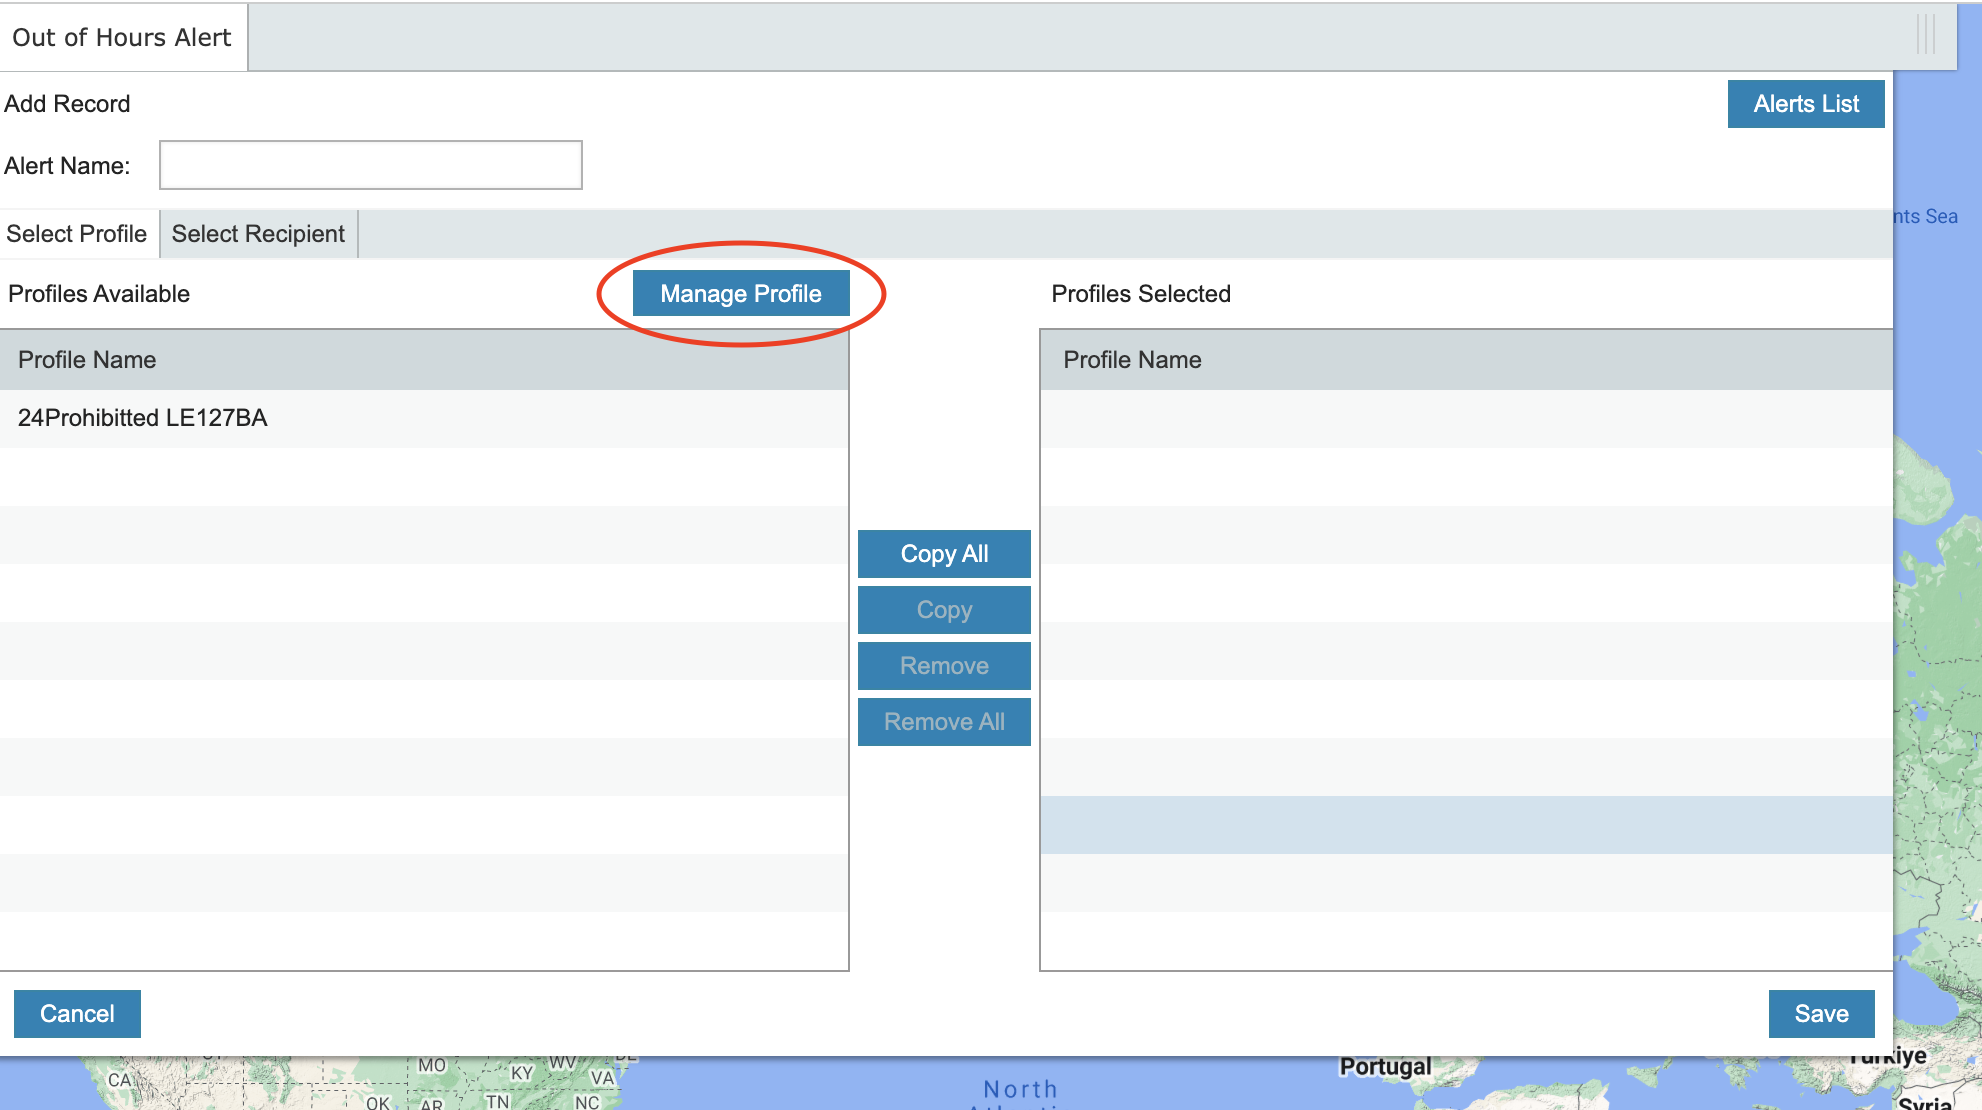
Go to Admin menu → Others → Alert Manager
![](../__attachments/14123009/Screenshot%202023-05-11%20at%2008.37.22.png?inst-v=74b0f4c6-9979-4c05-a999-4a1d94ab2a78)
2. Click Manage Profile button
![](../__attachments/14123009/Screenshot%202023-05-11%20at%2008.42.00.png?inst-v=74b0f4c6-9979-4c05-a999-4a1d94ab2a78)
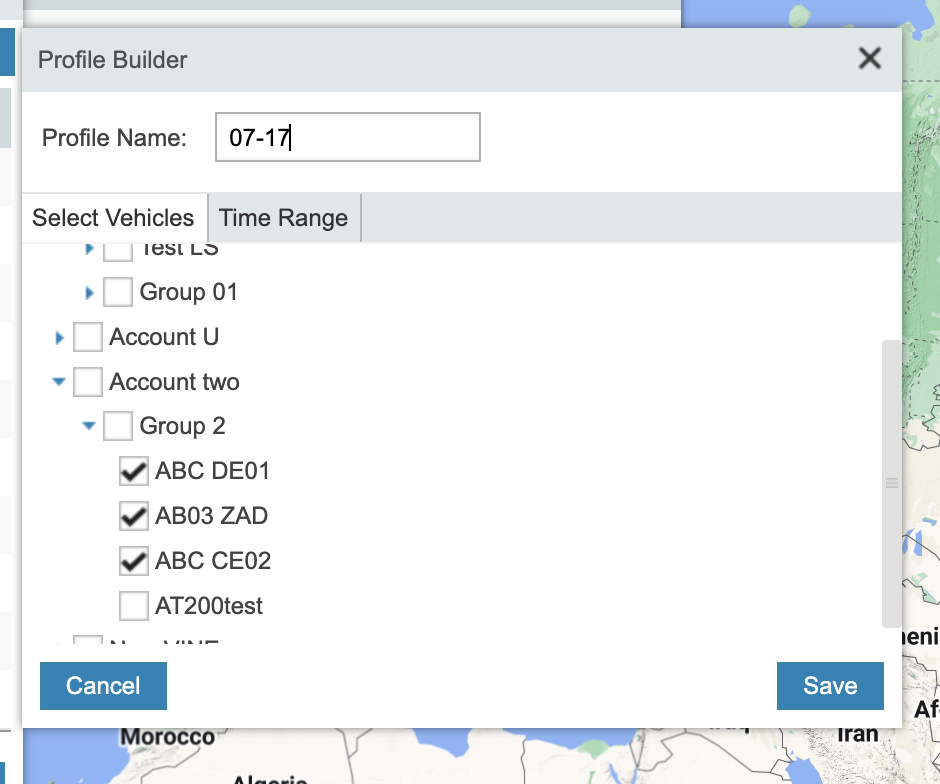
3. Click Create Profile button
![](../__attachments/14123009/Screenshot%202023-05-11%20at%2008.43.07.png?inst-v=74b0f4c6-9979-4c05-a999-4a1d94ab2a78)
4. Select vehicle(s) and enter Profile name.
![](../__attachments/14123009/Screenshot%202023-05-16%20at%2008.15.59.png?inst-v=74b0f4c6-9979-4c05-a999-4a1d94ab2a78)
5. Click on Time Range tab. Select permitted time.
![](../__attachments/14123009/Screenshot%202023-05-16%20at%2008.17.11.png?inst-v=74b0f4c6-9979-4c05-a999-4a1d94ab2a78)
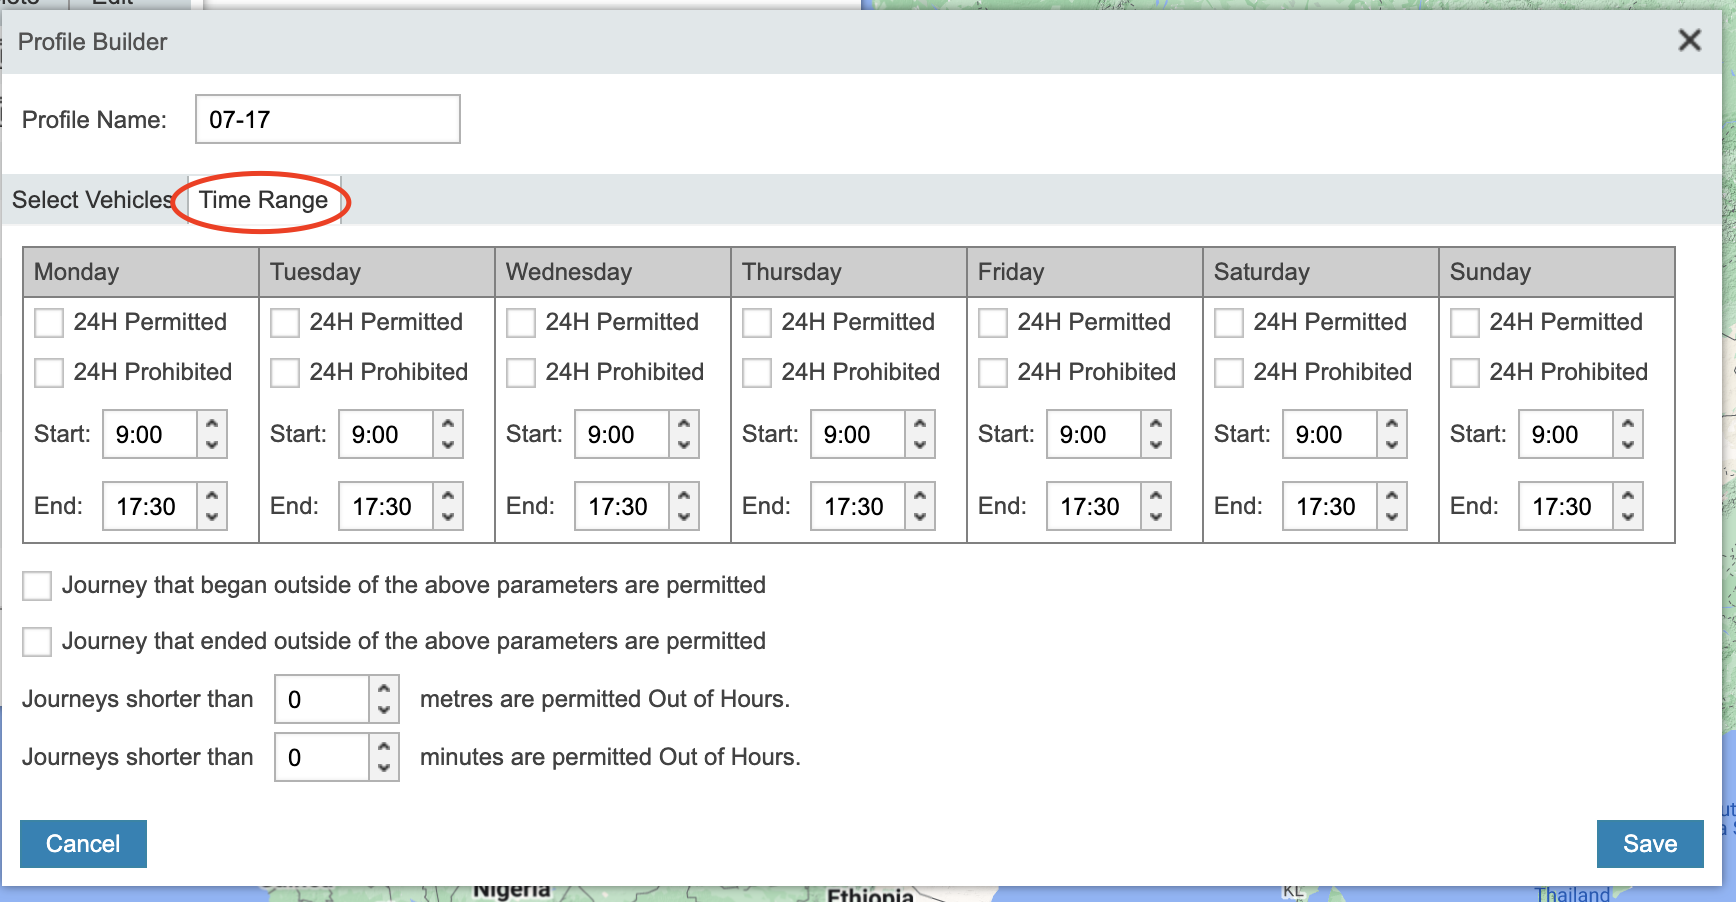
6. Click Save button.
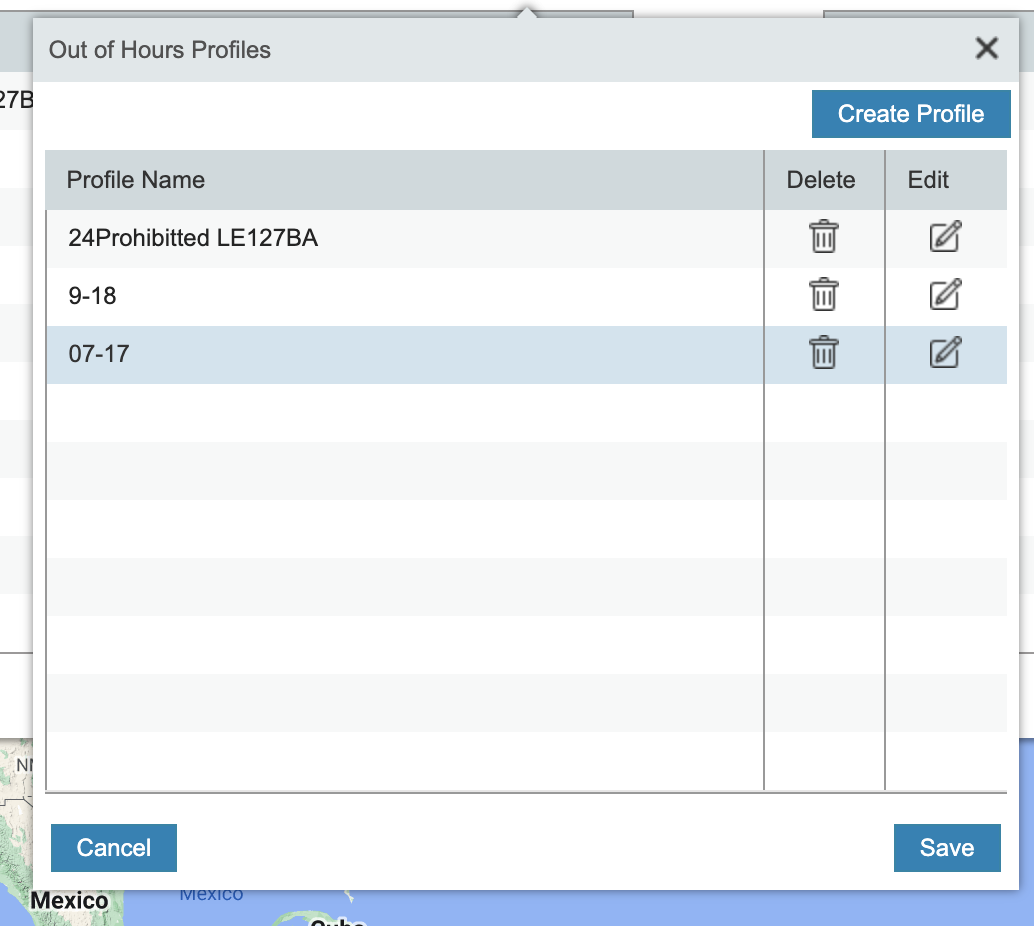
7. Click Save button in “Out of Hours Profiles“ window.
![](../__attachments/14123009/Screenshot%202023-05-16%20at%2008.34.15.png?inst-v=74b0f4c6-9979-4c05-a999-4a1d94ab2a78)
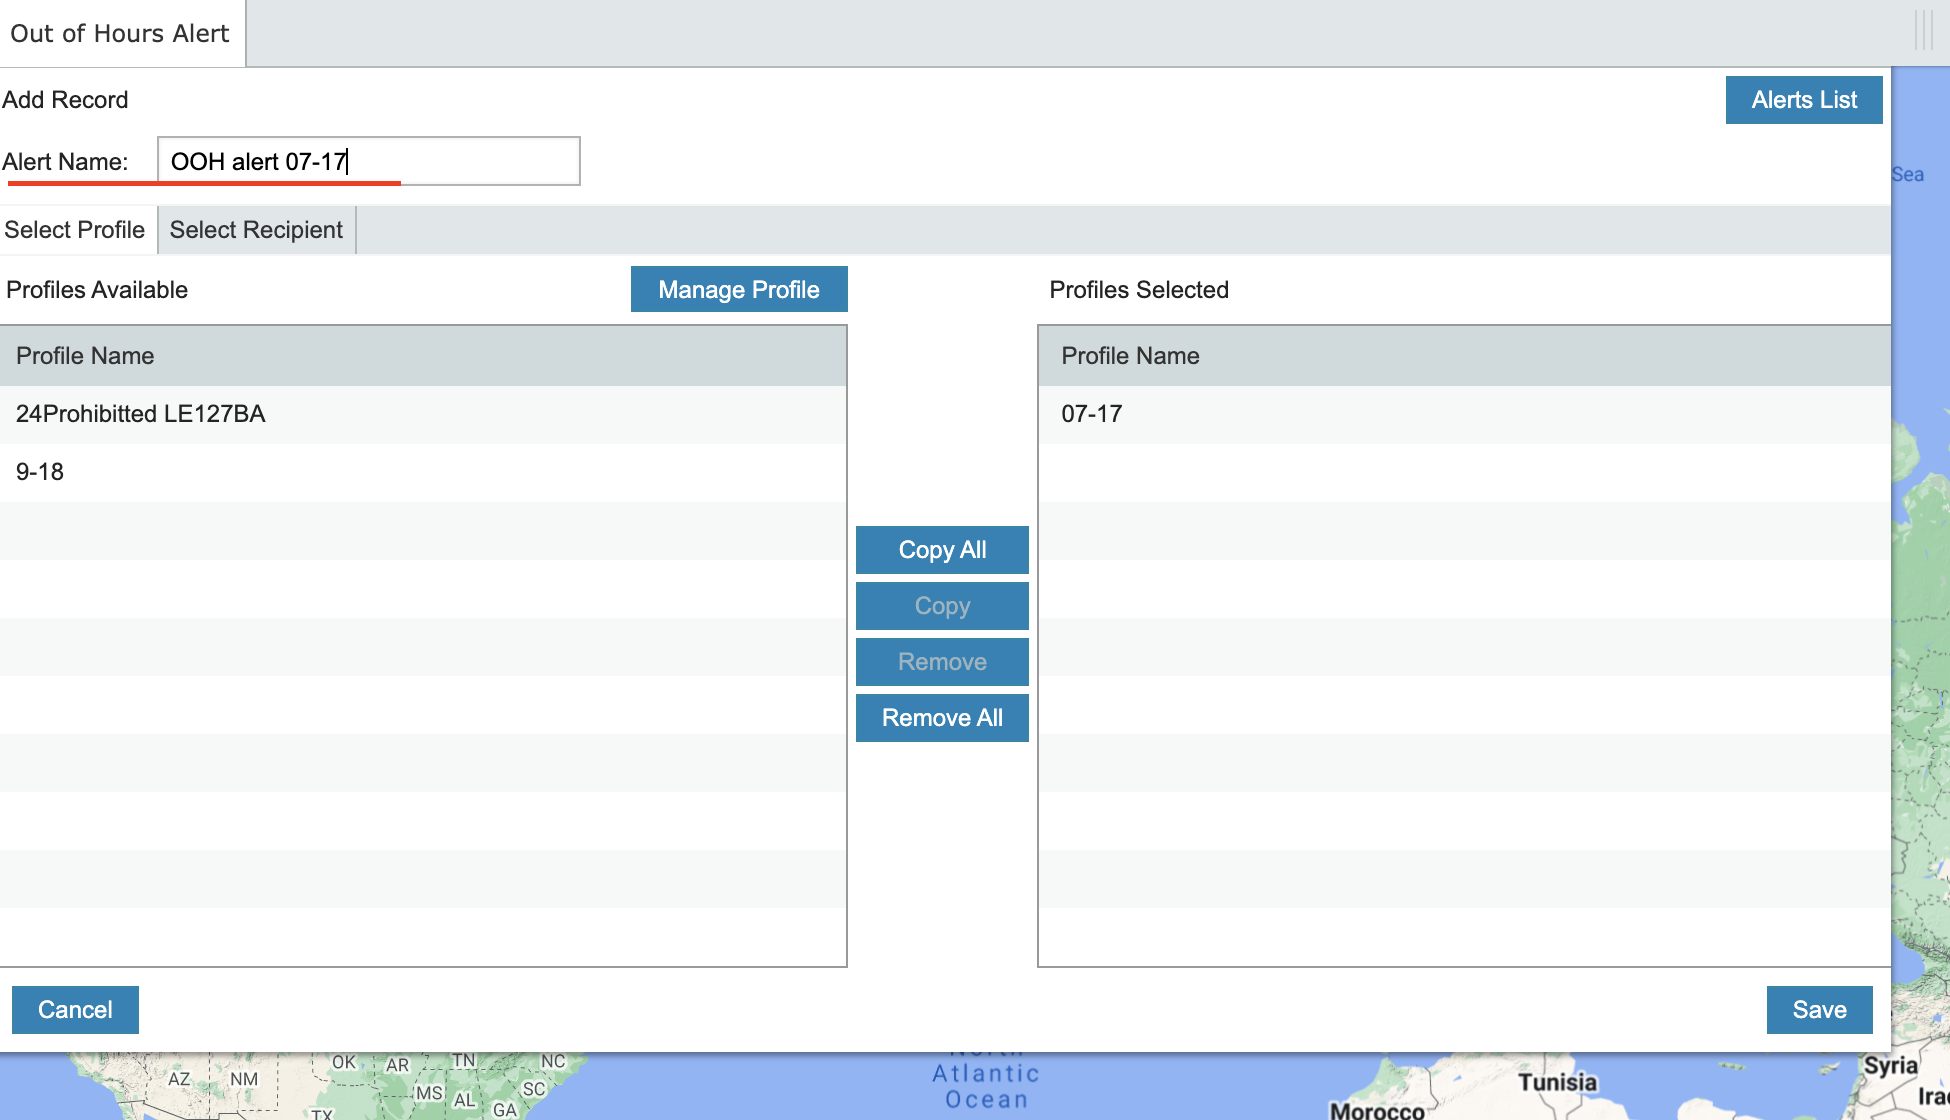
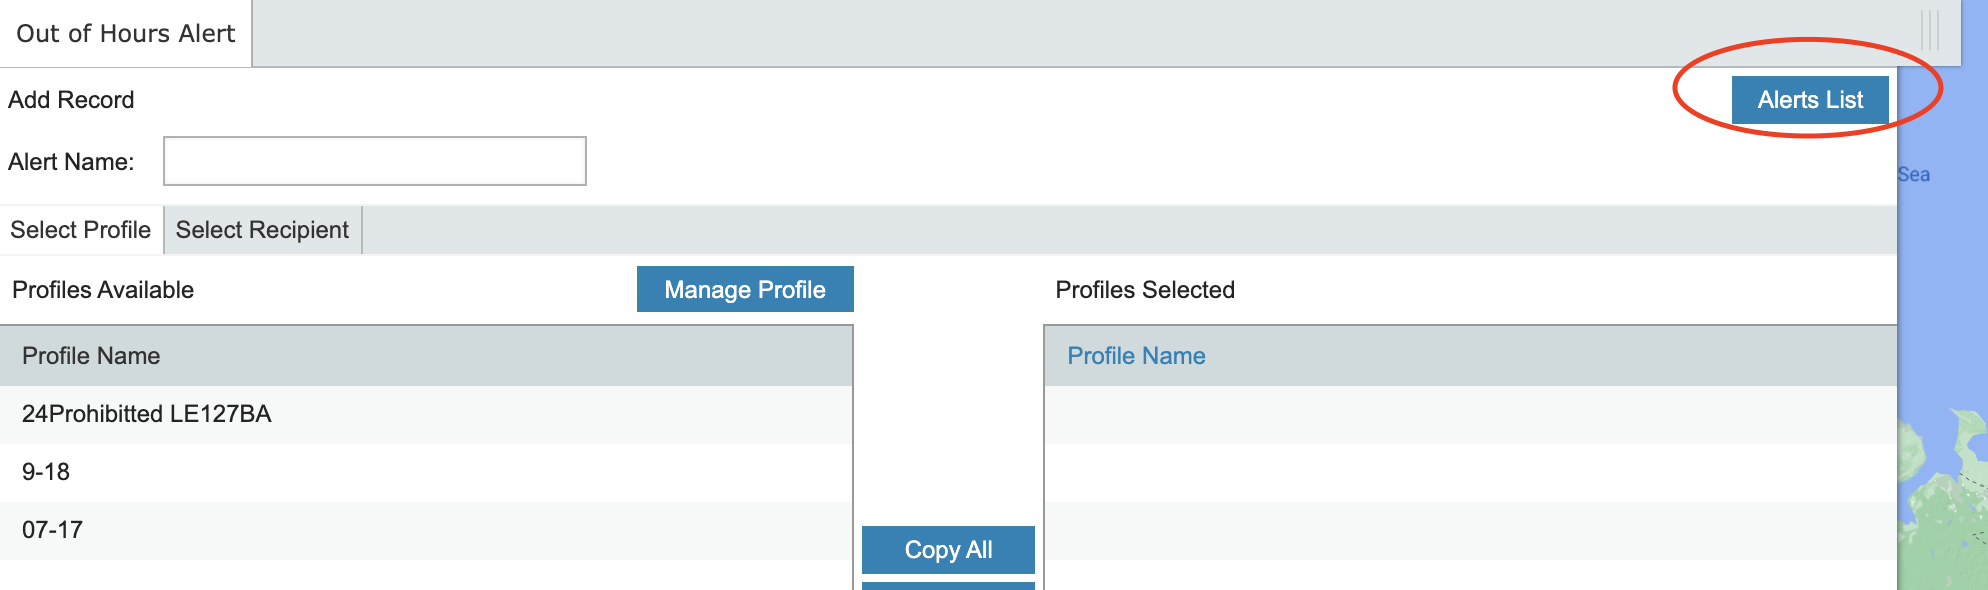
8. Select profile(s) in Profiles Available section and click Copy button
![](../__attachments/14123009/Screenshot%202023-05-16%20at%2008.36.20.png?inst-v=74b0f4c6-9979-4c05-a999-4a1d94ab2a78)
9. Enter Alert name
![](../__attachments/14123009/Screenshot%202023-05-16%20at%2008.38.29.png?inst-v=74b0f4c6-9979-4c05-a999-4a1d94ab2a78)
10. Click on tab “Select Recipient“. The checkbox “Send Alert to Self:“ is selected by default.
![](../__attachments/14123009/Screenshot%202023-05-16%20at%2008.39.36.png?inst-v=74b0f4c6-9979-4c05-a999-4a1d94ab2a78)
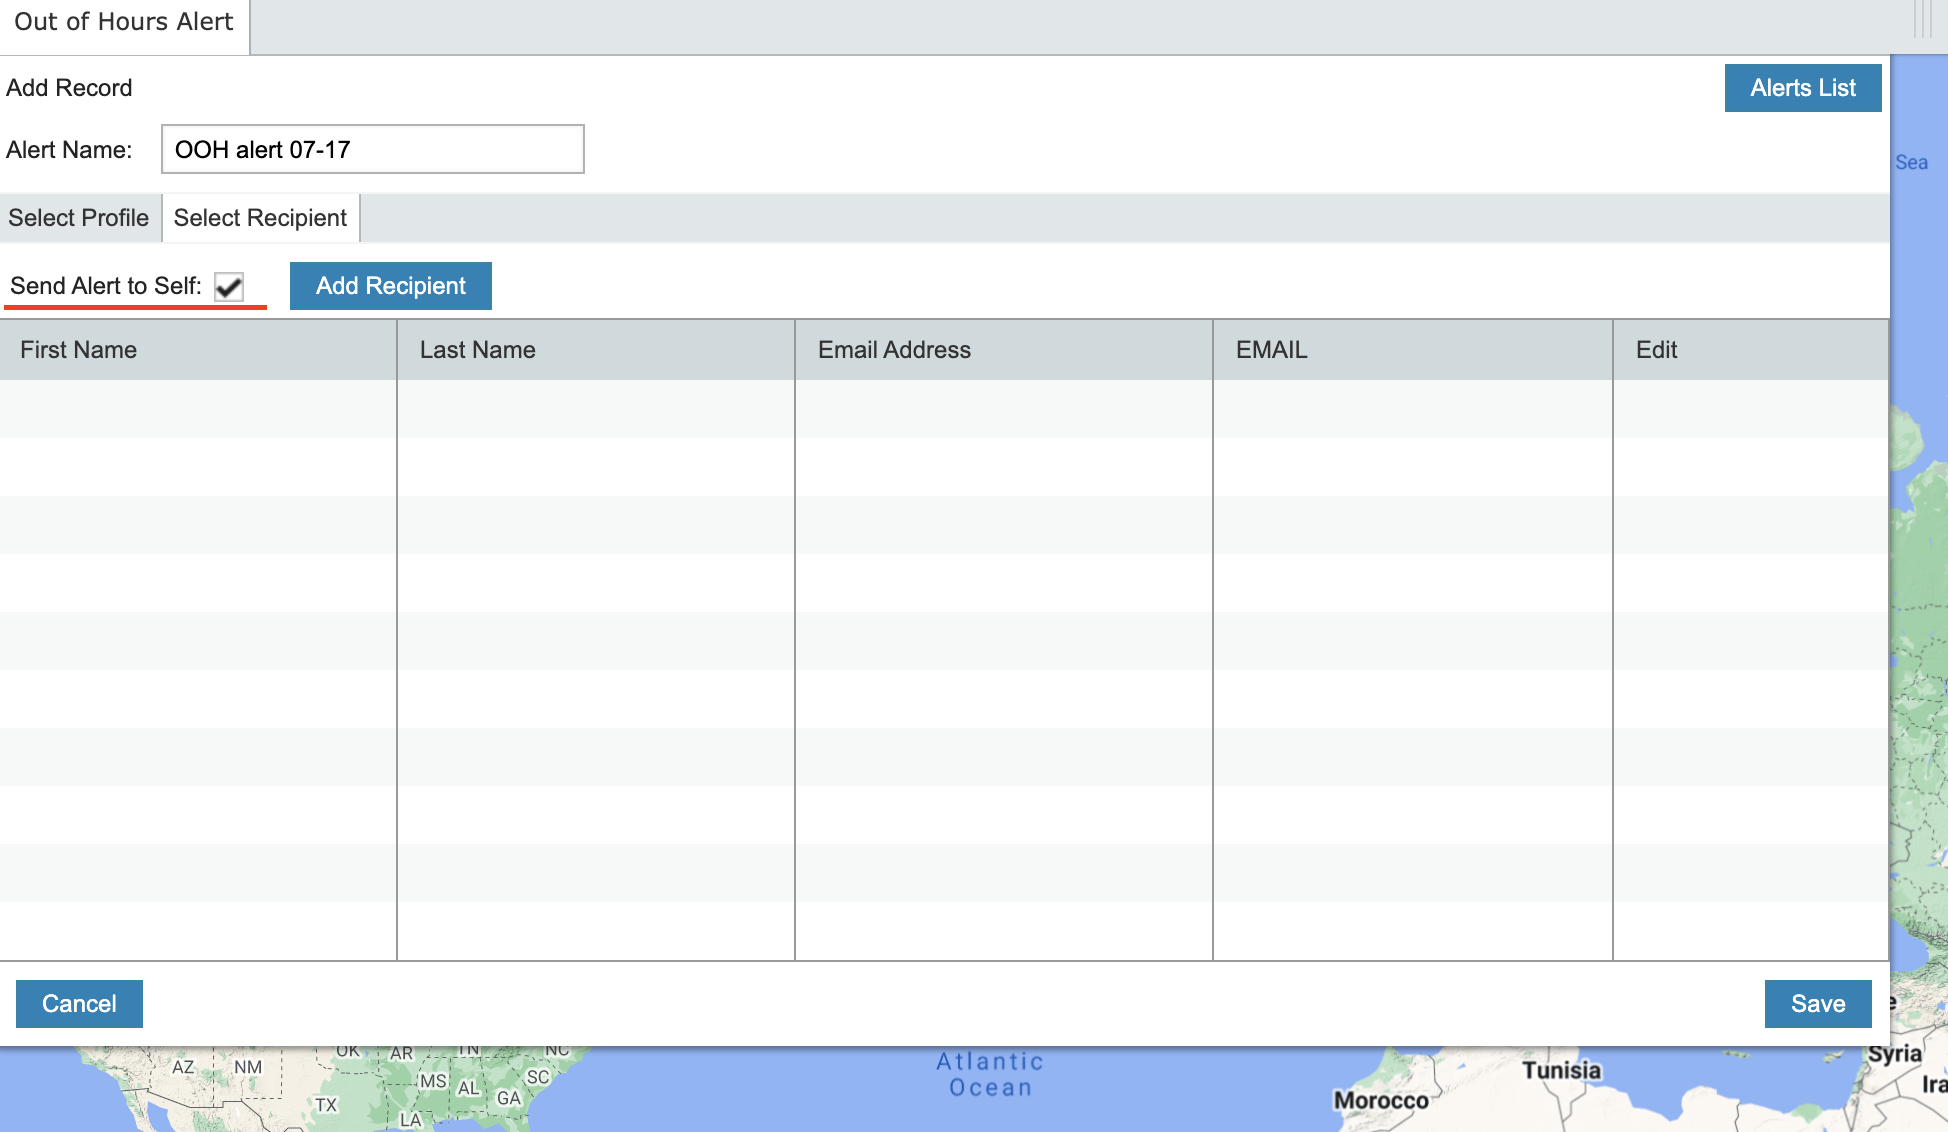
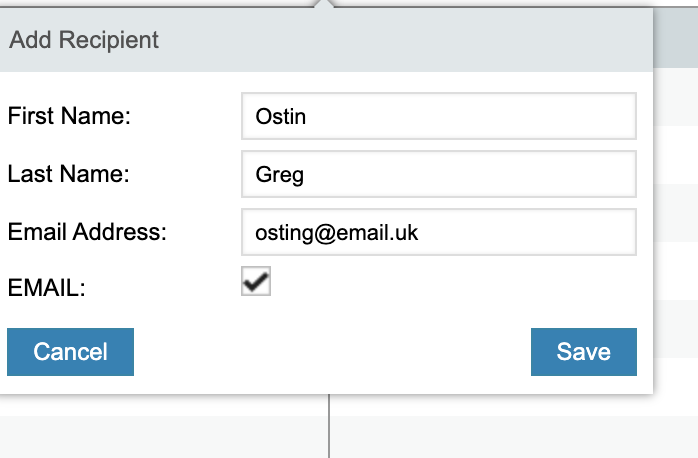
Possible to add new recipient(s). Click on button “Add Recipient“. Enter First and Last name, Email address and check checkbox ”EMAIL”(it means that this recipient will receive an alert).
![](../__attachments/14123009/Screenshot%202023-05-16%20at%2008.42.24.png?inst-v=74b0f4c6-9979-4c05-a999-4a1d94ab2a78)
Click Save button.
![](../__attachments/14123009/Screenshot%202023-05-16%20at%2008.49.33.png?inst-v=74b0f4c6-9979-4c05-a999-4a1d94ab2a78)
Recipient is added to the alert.
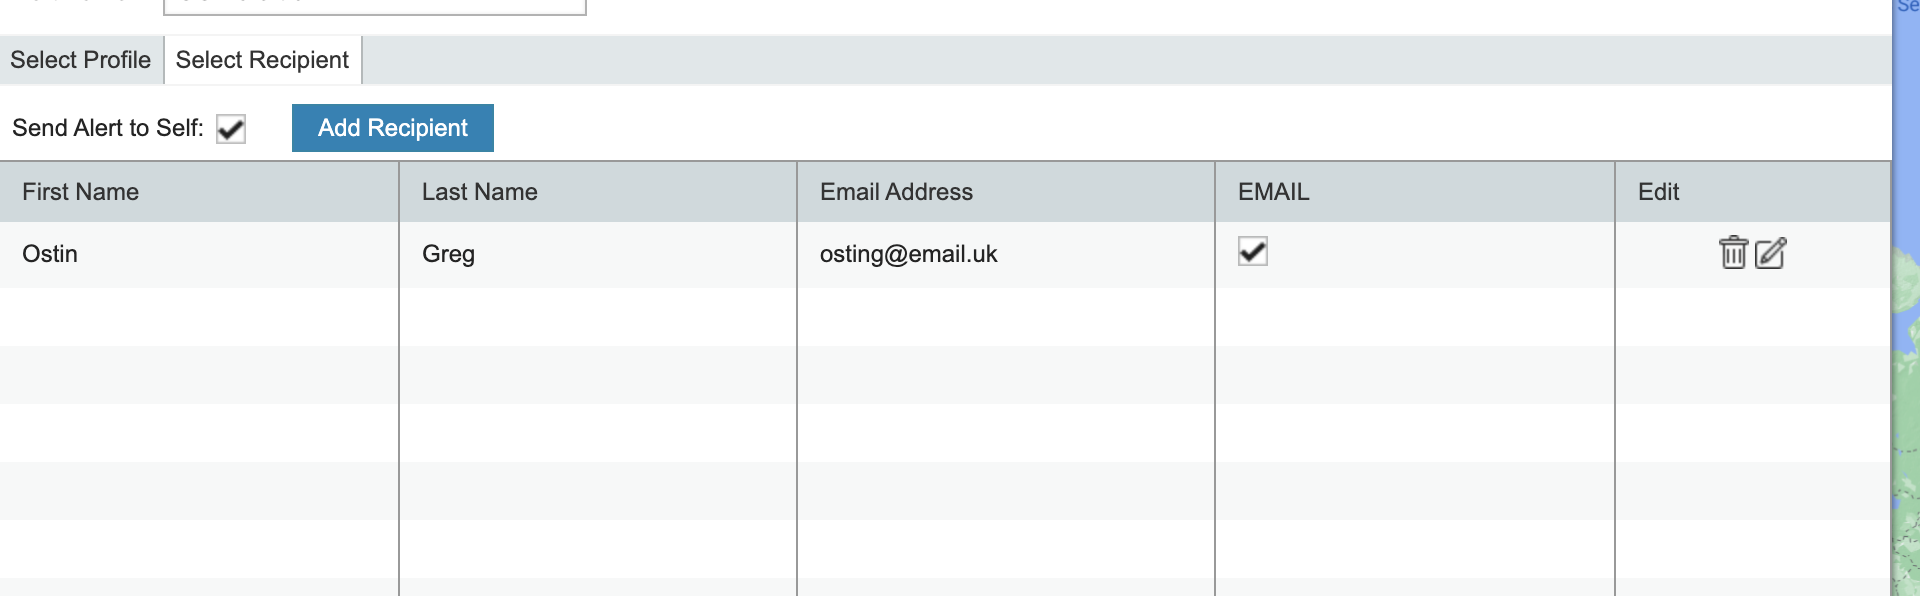
![](../__attachments/14123009/Screenshot%202023-05-16%20at%2008.50.12.png?inst-v=74b0f4c6-9979-4c05-a999-4a1d94ab2a78)
Click Save button.
Click Ok button in confirmation message.
![](../__attachments/14123009/Screenshot%202023-05-16%20at%2008.51.16.png?inst-v=74b0f4c6-9979-4c05-a999-4a1d94ab2a78)
Alerts List
All created alerts are shown in Out of Hours Alert manager. Click button “Alerts List“
![](../__attachments/14123009/Screenshot%202023-05-16%20at%2008.52.25.png?inst-v=74b0f4c6-9979-4c05-a999-4a1d94ab2a78)
A filter is applied to the ‘Status’ column where ‘Active’ is selected as default.
![](../__attachments/14123009/Screenshot%202023-05-16%20at%2008.59.27.png?inst-v=74b0f4c6-9979-4c05-a999-4a1d94ab2a78)
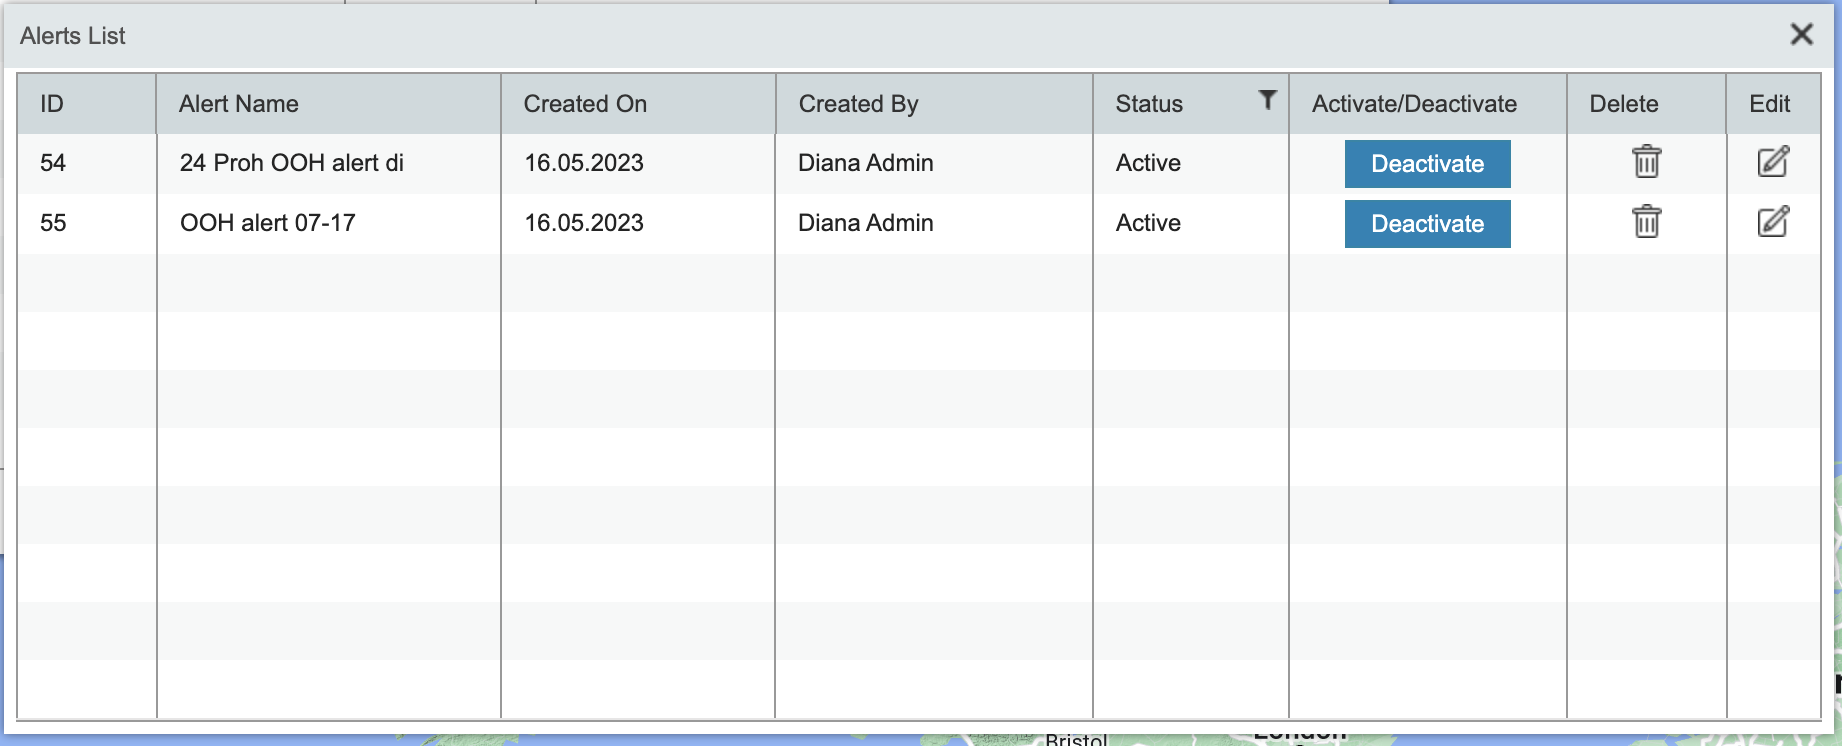
The ‘Edit’ button allows the to modify the selection of the Out Of Hours Profile and Recipient values.
The ‘Activate’ and ‘Deactivate’ buttons to Activate and Deactivate the Alert respectively.